내일배움캠프 Node.js 트랙 1일차
1. ZEP에서 이루어진 팀단위 프로젝트
(1) 프로젝트 기획 및 준비
일주일 동안 7조의 조장을 맡아, 팀을 소개하는 프로젝트인 Monster A.K.A.ive의 진행을 맡게 되었다.
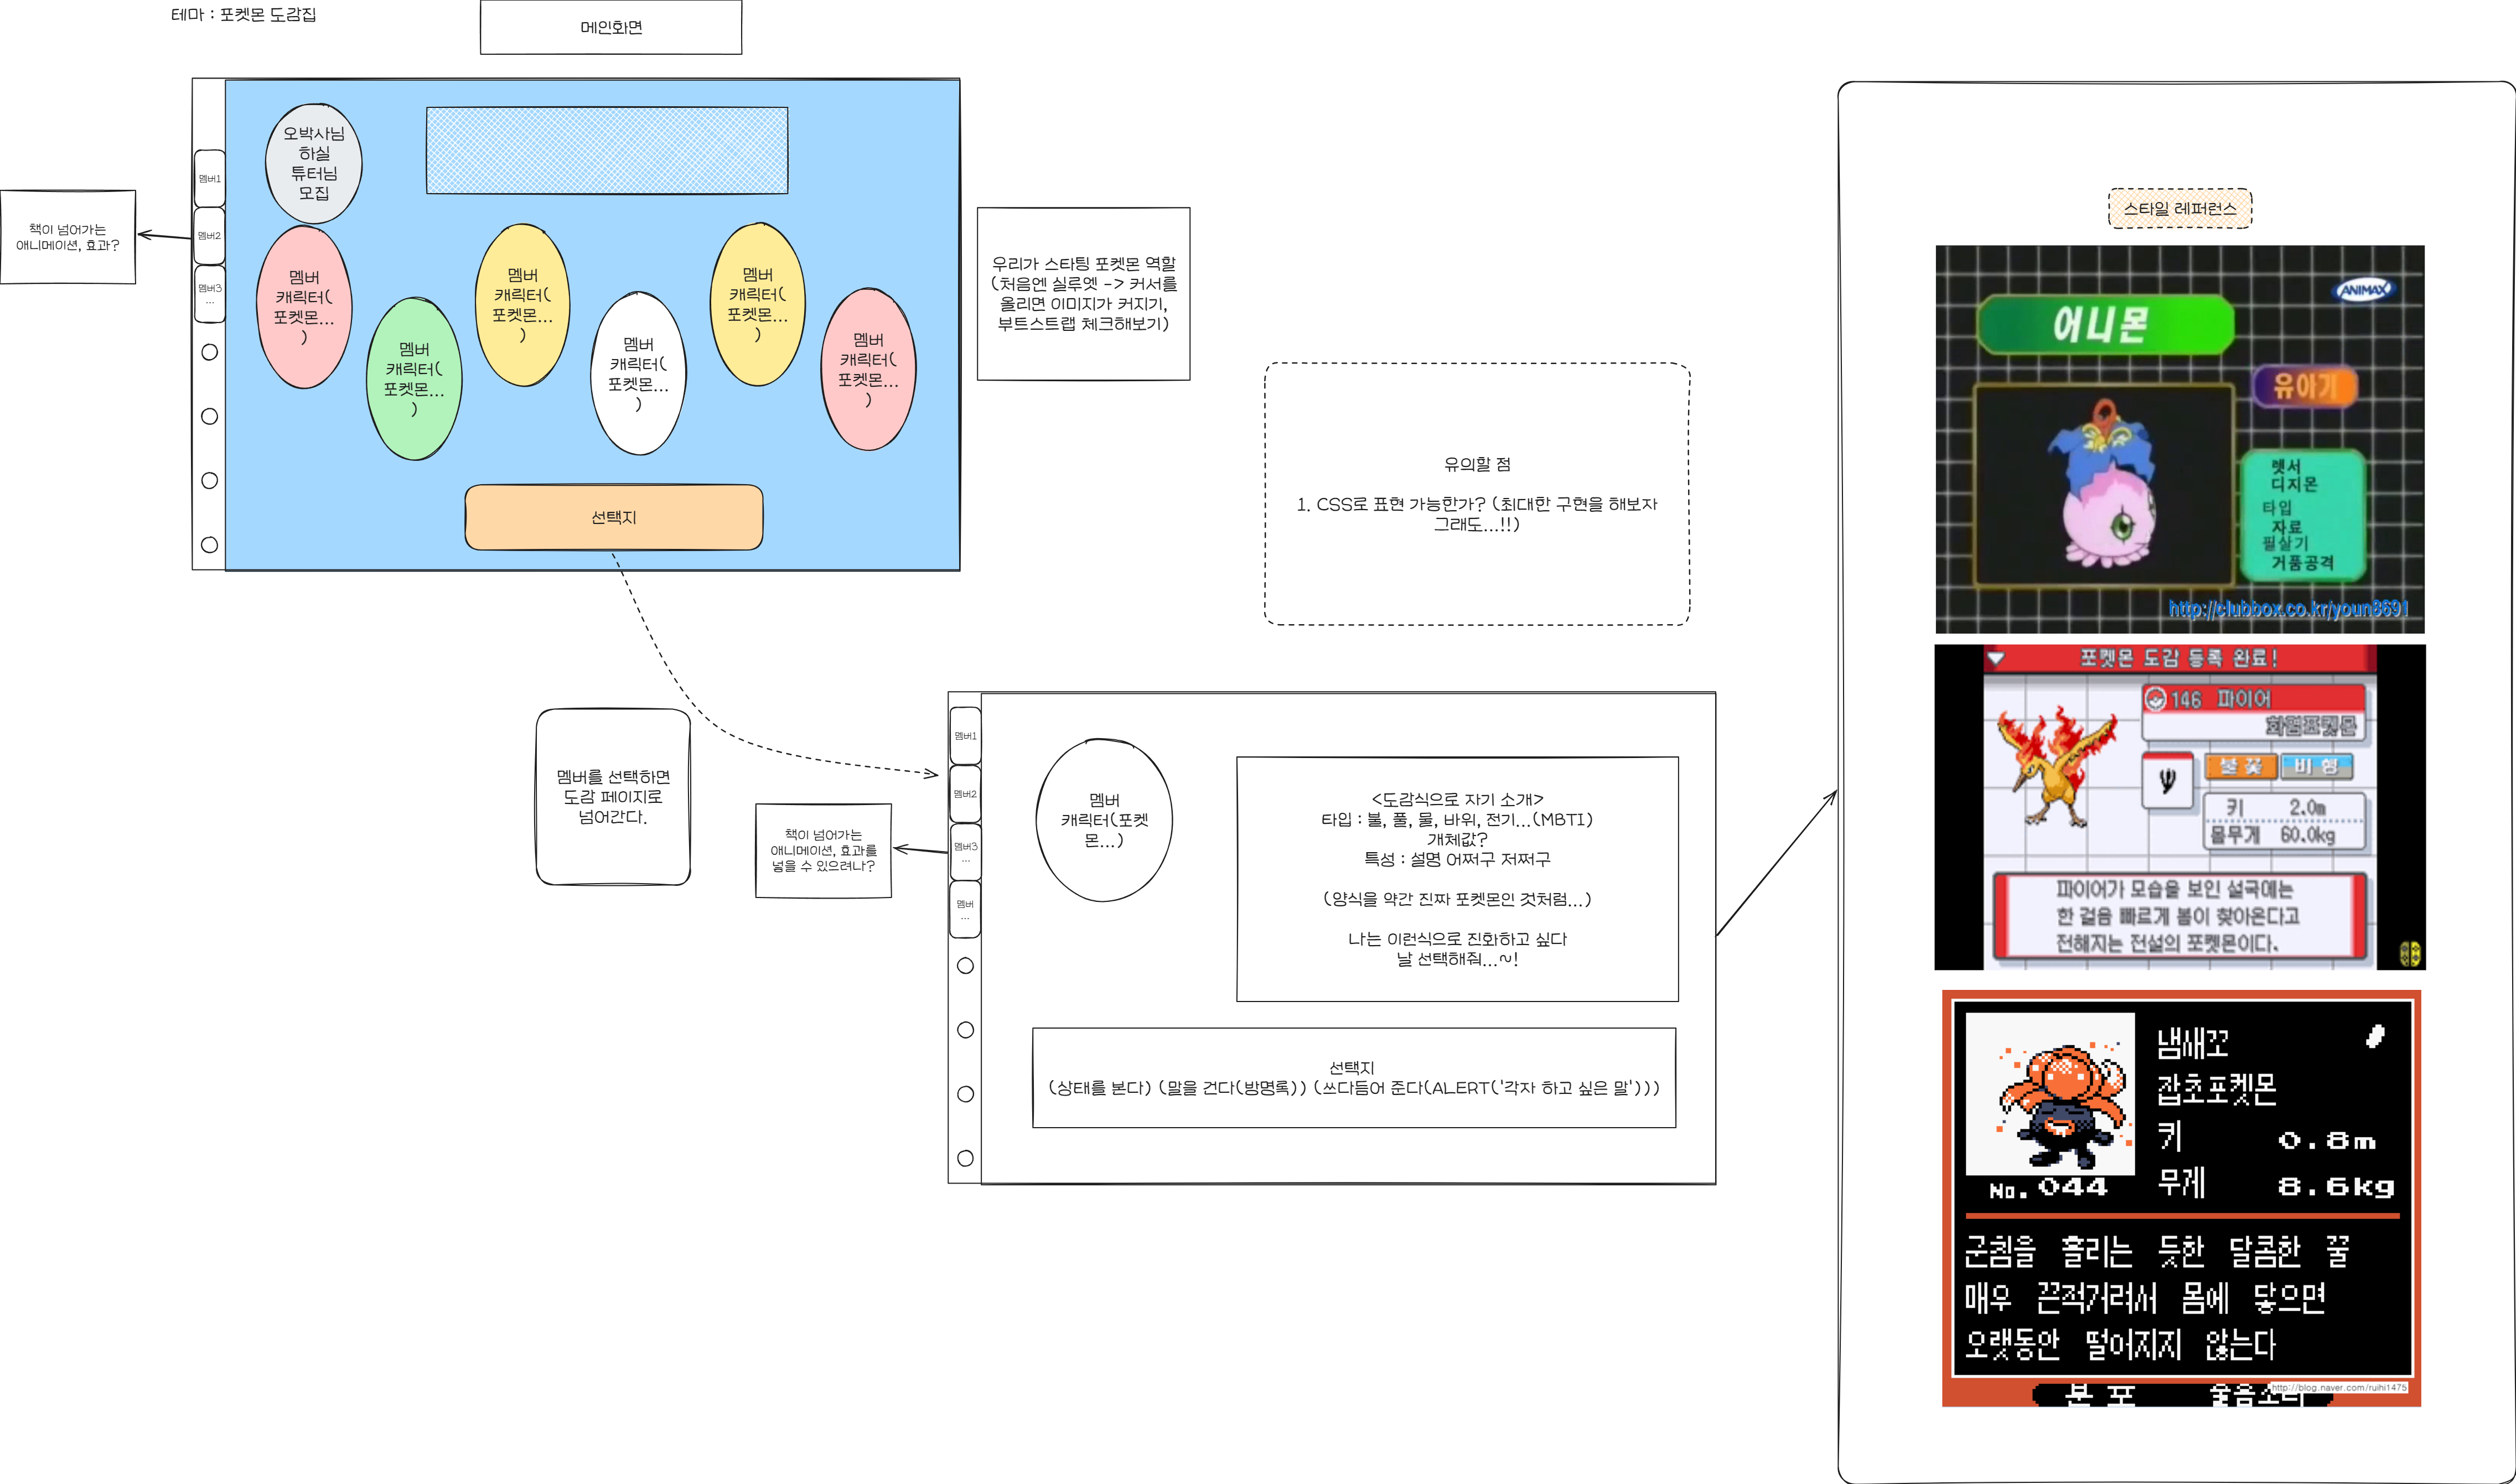
우선 오늘은 캔버스 위에 자유롭게 다이어그램을 이용하여 우리가 만들고자 하는 웹사이트를 구상해 보았다.

북마크로부터 시작한 브레인 스토밍의 종착지는 바로 포켓몬 도감집이라는 컨셉.
우리가 스타팅 몬스터의 역할을 맡고, 사이트 방문자가 몬스터 볼 중 하나를 선택하면 포켓몬 도감처럼 각자의 소개글이 나오게끔 프로젝트의 방향을 잡았다.
(2) 프로젝트 진행 과정
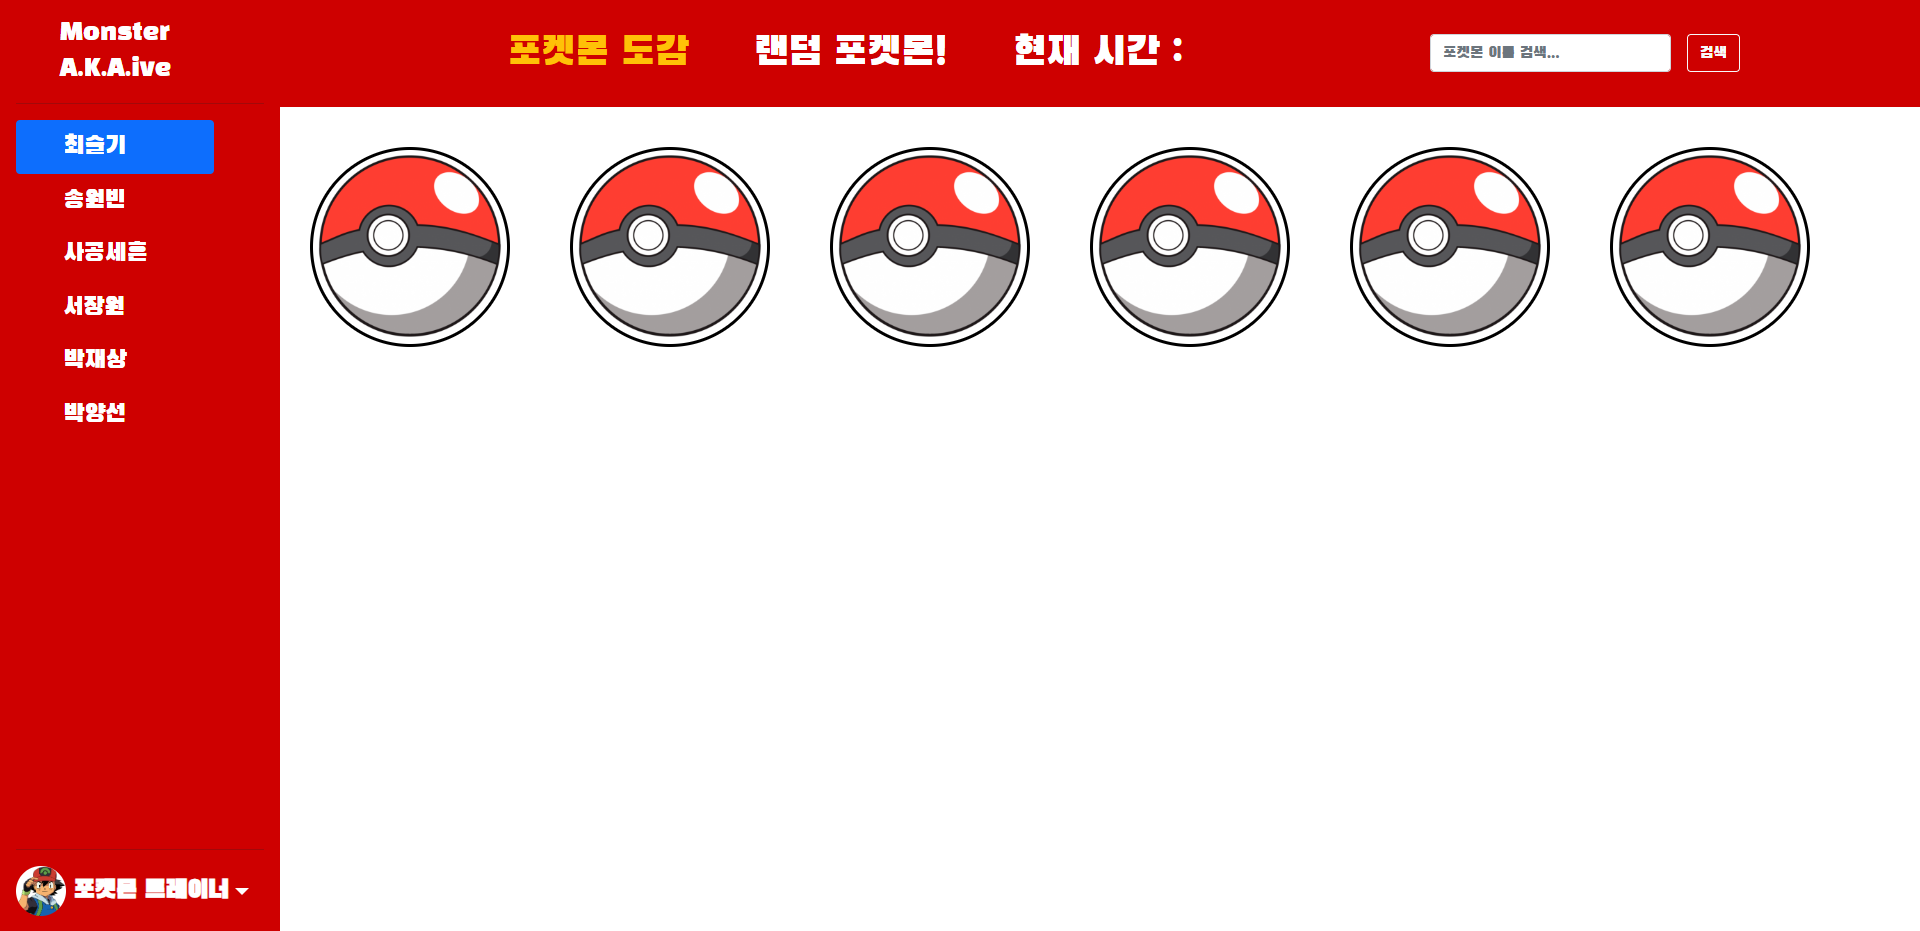
아직은 개발에 익숙지 않은 팀원분들도 계시기에 오늘은 HTML과 CSS를 이용해 웹페이지의 뼈대만 간단히 만들어 보았다.

HTML 기본 골격에 J쿼리 스크립트와 부트스트랩 링크를 삽입하였다.
<!-- J쿼리 import -->
<script src="https://ajax.googleapis.com/ajax/libs/jquery/3.5.1/jquery.min.js"></script>
<!-- 부트스트랩 import -->
<link href="https://cdn.jsdelivr.net/npm/bootstrap@5.0.2/dist/css/bootstrap.min.css" rel="stylesheet"
    integrity="sha384-EVSTQN3/azprG1Anm3QDgpJLIm9Nao0Yz1ztcQTwFspd3yD65VohhpuuCOmLASjC" crossorigin="anonymous" />
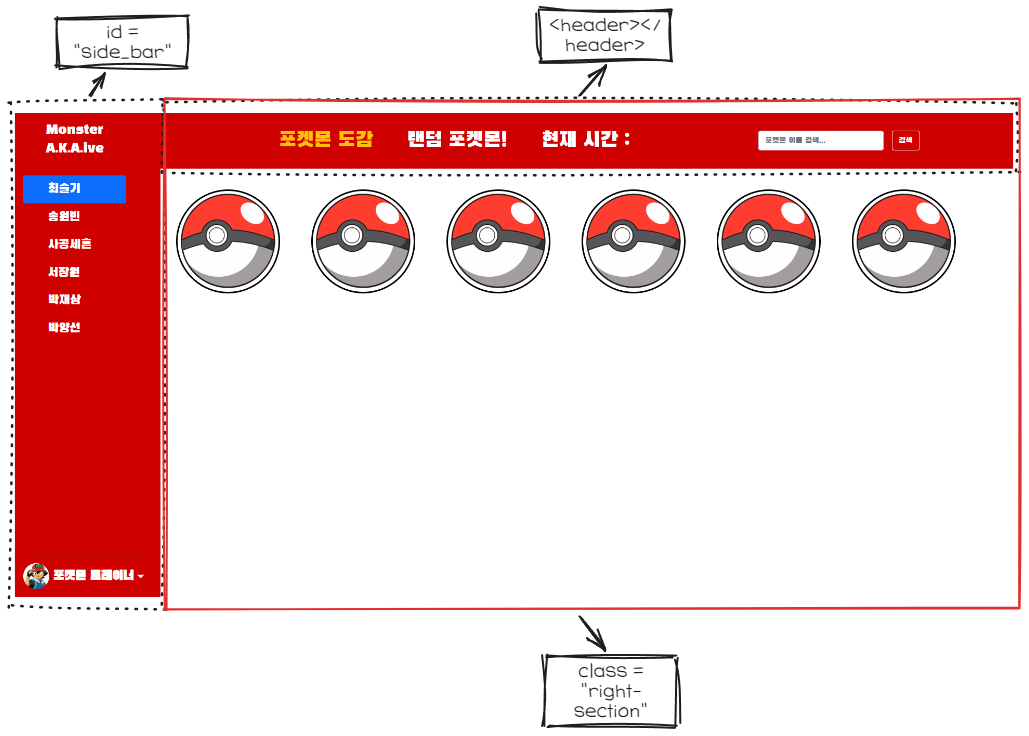
부트스트랩에서 사이드바와 헤더를 HTML 형식으로 추출하였다.
- 활용한 헤더

<header class="p-3 text-bg-dark">
    <div class="container">
		<div class="d-flex flex-wrap align-items-center justify-content-center justify-content-lg-start">
	        <a href="/" class="d-flex align-items-center mb-2 mb-lg-0 text-white text-decoration-none">
	          <svg class="bi me-2" width="40" height="32" role="img" aria-label="Bootstrap"><use xlink:href="#bootstrap"></use></svg>
	        </a>

	        <ul class="nav col-12 col-lg-auto me-lg-auto mb-2 justify-content-center mb-md-0">
	          <li><a href="#" class="nav-link px-2 text-secondary">Home</a></li>
	          <li><a href="#" class="nav-link px-2 text-white">Features</a></li>
	          <li><a href="#" class="nav-link px-2 text-white">Pricing</a></li>
	          <li><a href="#" class="nav-link px-2 text-white">FAQs</a></li>
	          <li><a href="#" class="nav-link px-2 text-white">About</a></li>
	        </ul>

	        <form class="col-12 col-lg-auto mb-3 mb-lg-0 me-lg-3" role="search">
	          <input type="search" class="form-control form-control-dark text-bg-dark" placeholder="Search..." aria-label="Search">
	        </form>

	        <div class="text-end">
		        <button type="button" class="btn btn-outline-light me-2">Login</button>
		        <button type="button" class="btn btn-warning">Sign-up</button>
	        </div>
	    </div>
    </div>
</header>
- 활용한 사이드 바
<div class="d-flex flex-column flex-shrink-0 p-3 text-bg-dark" style="width: 280px;">
    <a href="/" class="d-flex align-items-center mb-3 mb-md-0 me-md-auto text-white text-decoration-none">
      <svg class="bi pe-none me-2" width="40" height="32"><use xlink:href="#bootstrap"></use></svg>
      <span class="fs-4">Sidebar</span>
    </a>
    <hr>
    <ul class="nav nav-pills flex-column mb-auto">
      <li class="nav-item">
        <a href="#" class="nav-link active" aria-current="page">
          <svg class="bi pe-none me-2" width="16" height="16"><use xlink:href="#home"></use></svg>
          Home
        </a>
      </li>
      <li>
        <a href="#" class="nav-link text-white">
          <svg class="bi pe-none me-2" width="16" height="16"><use xlink:href="#speedometer2"></use></svg>
          Dashboard
        </a>
      </li>
      <li>
        <a href="#" class="nav-link text-white">
          <svg class="bi pe-none me-2" width="16" height="16"><use xlink:href="#table"></use></svg>
          Orders
        </a>
      </li>
      <li>
        <a href="#" class="nav-link text-white">
          <svg class="bi pe-none me-2" width="16" height="16"><use xlink:href="#grid"></use></svg>
          Products
        </a>
      </li>
      <li>
        <a href="#" class="nav-link text-white">
          <svg class="bi pe-none me-2" width="16" height="16"><use xlink:href="#people-circle"></use></svg>
          Customers
        </a>
      </li>
    </ul>
    <hr>
    <div class="dropdown">
      <a href="#" class="d-flex align-items-center text-white text-decoration-none dropdown-toggle" data-bs-toggle="dropdown" aria-expanded="false">
        <img src="https://github.com/mdo.png" alt="" width="32" height="32" class="rounded-circle me-2">
        <strong>mdo</strong>
      </a>
      <ul class="dropdown-menu dropdown-menu-dark text-small shadow">
        <li><a class="dropdown-item" href="#">New project...</a></li>
        <li><a class="dropdown-item" href="#">Settings</a></li>
        <li><a class="dropdown-item" href="#">Profile</a></li>
        <li><hr class="dropdown-divider"></li>
        <li><a class="dropdown-item" href="#">Sign out</a></li>
      </ul>
    </div>
  </div>

위와 같이 부트스트랩에서 코드를 빌려와 골격을 잡았고, 수많은 수정과 보완을 통해 우리가 원하던 컨셉으로 사이트를 구현할 수 있었다.
가장 까다로웠던 부분은 각 오브젝트들을 배열하고 정렬시키는 과정이었다. 처음엔 정리가 되질 않아 엉망이었지만 다행히 웹개발 강의에서 아이템들을 정렬하는 방법을 배웠기 때문에 해결할 수 있었다.
/* div 속 내용물을 컬럼 하나로 정렬하는 방법 */
.mycards {
    display: flex;
    flex-direction: column;
    align-items: center;
    justify-content: center;
}
(3) 팀원들과 피드백 공유하기

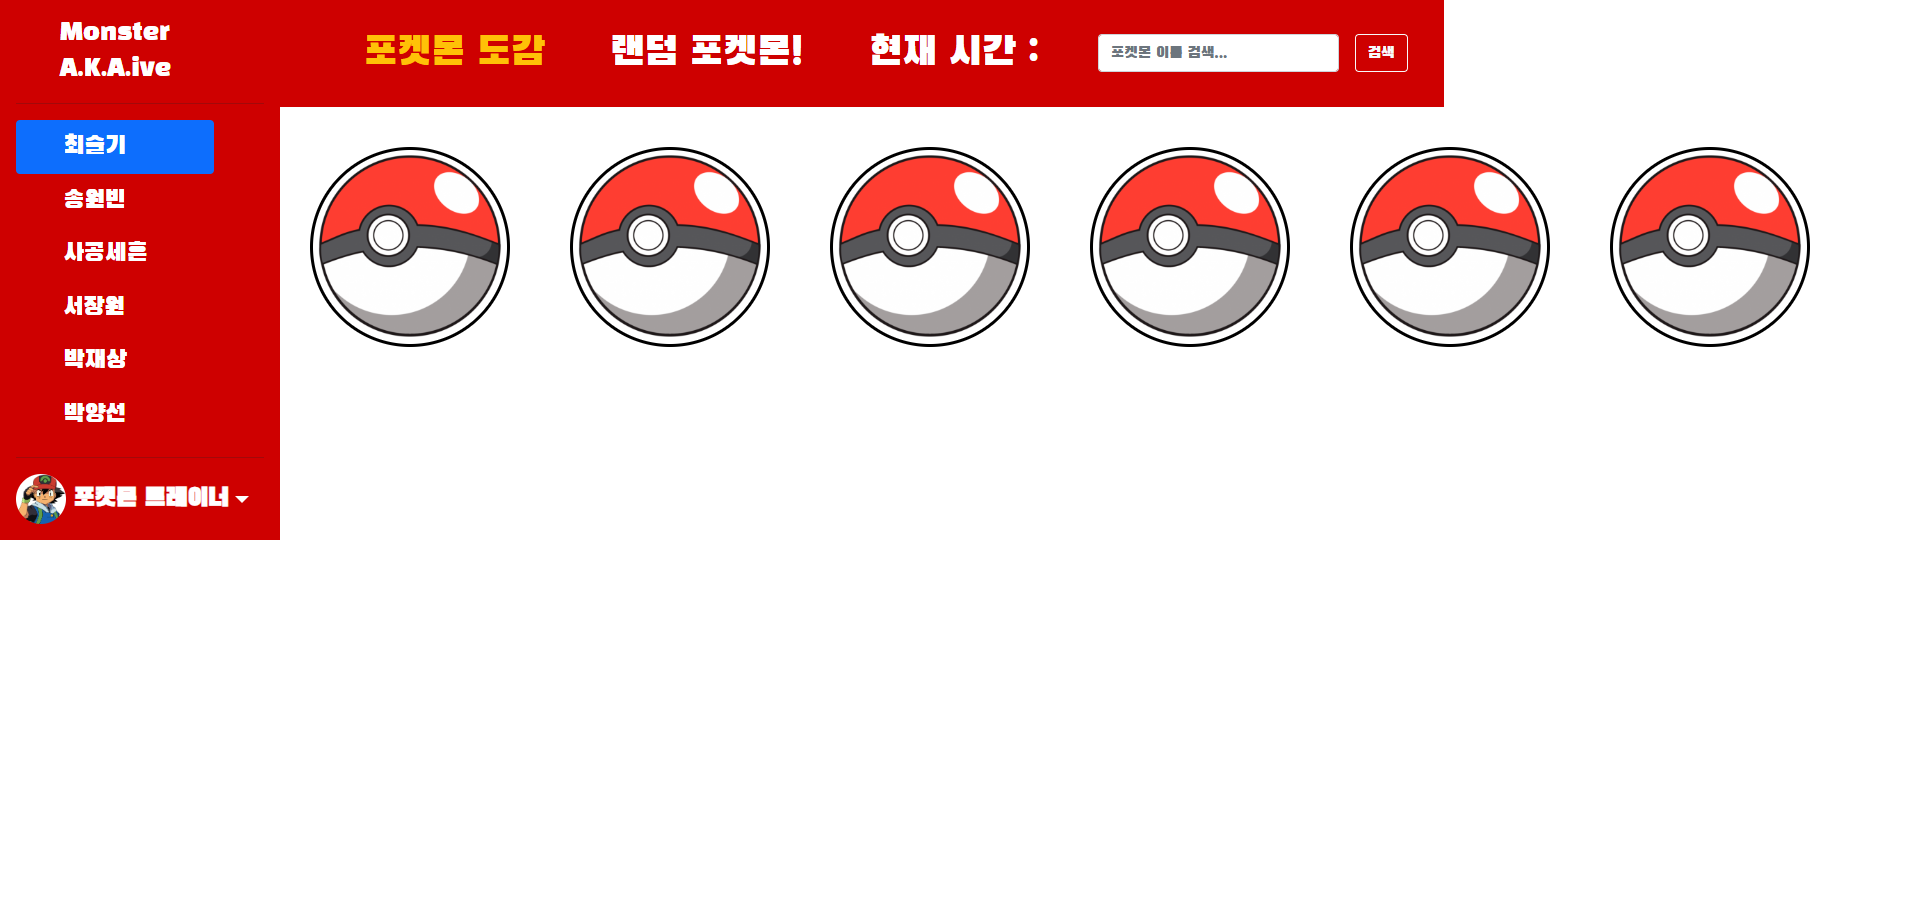
코드를 막 짜기 시작했을 때 사이드바와 헤더의 height와 width가 너무 짧아서 여러모로 애를 먹었는데 팀원의 도움을 받아 해결할 수 있었다. 아래 코드에서 주석으로 표시한 부분들을 해제하면 사이드바와 헤더가 화면에 맞게 조정된다.
header {
    font-family: "Black Han Sans", sans-serif;
    font-size: 40px;
    background-color: rgb(206, 0, 0);
    padding: 0;
    /* width: 100%; */
}
.right-section {
    /* width: 100vw; */
    display: flex;
    flex-direction: column;
    align-items: flex-start;
    justify-content: space-around;
    margin: 0;
    padding: 0;
    align-content: flex-start;
}

#side_bar {
    font-family: "Black Han Sans", sans-serif;
    font-size: 25px;
    background-color: rgb(206, 0, 0);
    display: flex;
    /* height: 100vh; */
    flex-wrap: nowrap;
    flex-direction: normal;
    align-items: normal;
    justify-content: normal;
}
width: 100%;
→ 아이템을 담고 있는 블록의 너비에 비례해서 백분율로 너비를 설정할 수 있다.
width: 100vw; height: 100vh;
→ vw와 vh는 화면(Screen)기준으로 너비와 높이를 뜻한다.
(4) 오늘의 학습 키워드
" 초심과 복습 "
초심으로 되돌아가 사전캠프에서 배운 내용을 되돌아 보는 복습의 시간이었다.
'JS > TIL(Today I Learned)' 카테고리의 다른 글
| 2024-10-30 (2) | 2024.10.30 |
|---|---|
| 2024-10-29 (0) | 2024.10.29 |
| 24-10-25 (3) | 2024.10.25 |
| 24-10-24 (2) | 2024.10.24 |
| 24-10-23 (3) | 2024.10.23 |


댓글